
Introduction
The Labist Raspberry Pi 4WD Smart Robot Car DIY Kit is an ed-tech robotics kit developed for novices and aficionados alike that offers opportunities for hands-on exploration of automation, programming, and AI integration. It suits students, teachers, and hobbyists wishing to create and program their very own smart car.
This guide will give the reader the full details of the Labists Raspberry Pi 4WD Smart Robot Car with respect to its features, components, assembly process, applications, and troubleshooting.
What’s Inside the Labists Raspberry Pi 4WD Smart Robot Car Kit?
The kit has all the required components for building a working smart car. Here is a list of everything inside:
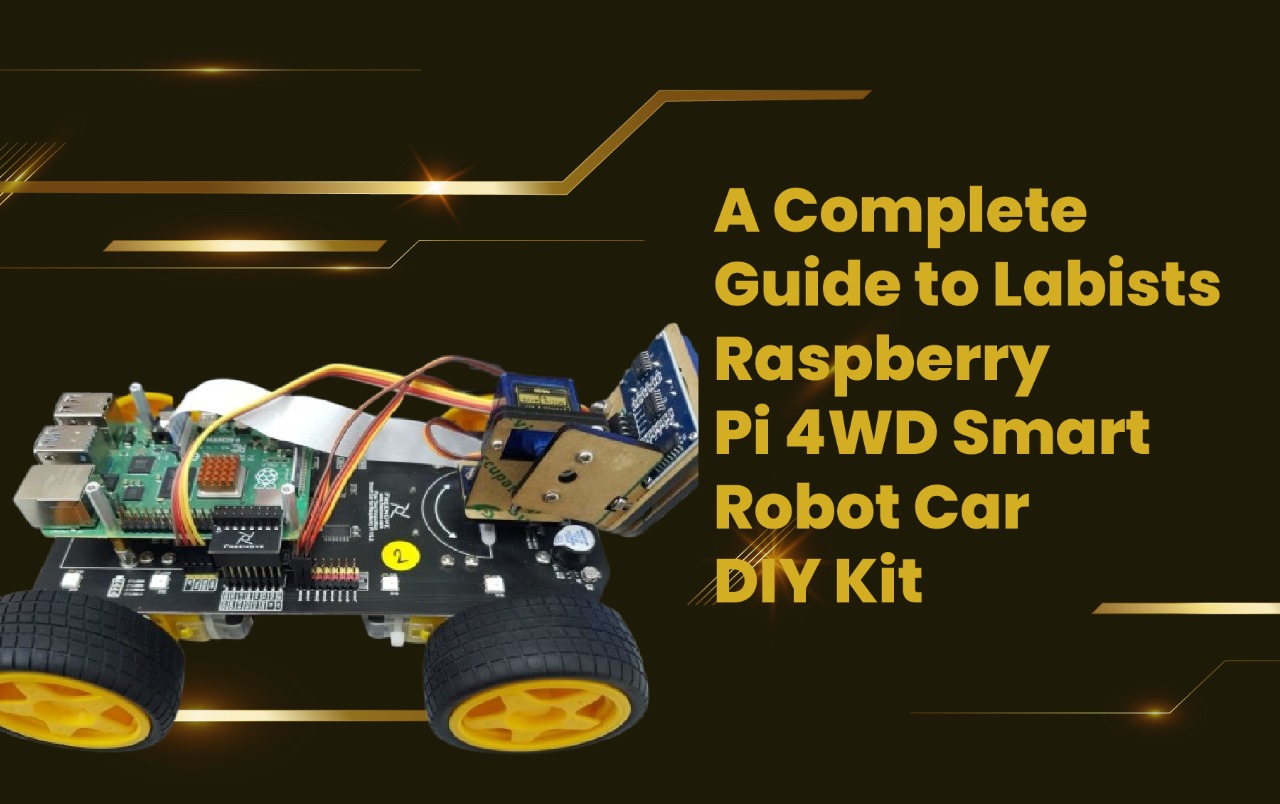
Raspberry Pi Board (Not Always Included)-It is the main processor; some kits would require you to buy this separately.
Motor Driver Board-The board that controls the movement and speed of the four-wheel-drive system.
Ultrasonic Sensor-This detects obstacles and avoids collisions while making movement.
Infrared (IR) Sensors-These allow line tracking for following a preset path.
Camera Module-This supports a real-time video stream and processing of the data using AI.
Acrylic Chassis-It is an upright platform that supports all other parts loaded on top.
Wheels and Motors-Four DC motors drive the wheels.
Battery Pack-Powers the system.
Cables and Screws-All are auxiliary to wiring and holding the modules in their designated positions.
Wi-Fi Module (If Included)-This allows control without any cables by use of a mobile app or web interface.
Features of Labists Raspberry Pi 4WD Smart Robot Car
Four-Wheel Drive System: Provides a more stable technique in movement over different surfaces.
Obstacle Avoidance: Detects an approaching object and navigates around the obstacles.
Line Tracking: Allows the car to follow the specified path using IR sensors.
Camera Integration: Enables video streaming and AI-based object detection.
Assembly Process
Setting up the Labists Raspberry Pi 4WD Smart Robot Car includes many steps. Here’s a step-by-step guide:
1. Frame Assembly
Attach wheels to the acrylic chassis.
Fasten the DC motors to the chassis.
2. Sensor Installation
Fix the ultrasonic sensor in the front for obstacle detection.
Install the IR sensor under the chassis for line tracking.
Fix the camera module to stream video.
3. Wiring and Connectivity
Connect the motors to the motor driver board.
Wire the ultrasonic and IR sensors to the Raspberry Pi.
Neatly arrange the wires to avoid a loose connection.
4. Software Setup
Install Raspbian OS on the Raspberry Pi.
Set up all other software packages needed for the sensors and motors.
Set up remote control features if required.
5. Testing and Calibration
Do preliminary tests for motor capability and sensor responsiveness.
Calibrate to alter the sensitivity for obstacle detection and line tracking.
Applications of the Labists Smart Robot Car
The Labists Raspberry Pi 4WD Smart Robot Car is versatile and it could be used in many different applications with applications like:
STEM Education: Helps students learn coding, electronics, and automation.
AI Research: Used in object recognition and autonomous navigation experiments.
Surveillance: It could be modified for monitoring and remote security.
Home Automation: It could be set up to perform smart home tasks.
Common Problems and Solutions
1.Motor Does Not Run
Ensure that the battery connections are properly made and check if the motor driver board receives power.
Verify wiring of the motors as well as the connection between the motors and the Raspberry Pi.
2.Sensors Do Not Work
Make sure the sensors are connected and configured properly.
Verify that the GPIO pins are assigned correctly in the setup.
3.Camera Is Not Working
In the settings of Raspberry Pi, enable the camera module.
Ensure that the camera is firmly attached and is not loose.
4. Wi-Fi Connection Problems
Check if the Raspberry Pi is connected to the correct network.
You may reboot the router if needed and reconfigure the network settings.
Conclusion
The Labists Raspberry Pi 4WD Smart Robot Car DIY Kit is a perfect mechanism for learning robotics, programming, and AI integration. It also gives hands-on experience working with coding, sensor integration, and automation. Therefore, without a doubt, this kit will give you a practical understanding of robotics, whether for educational, research, or hobby projects.